PROCESS
The container I used to make my pinhole camera was a Pringles tube. Firstly, we had to draw a small square on the tube which we then cut out using a knife. After cutting out our square, I then painted the inside of my tube black, we had to paint the inside black so that there would be no light inside, because if there is light then the image will not show. After painting my tube and waiting for it to dry, I cut out a small piece of tin foil to tape over the outside of the square. Once the square was covered I pierced a small hole into the foil using a pin. Then we had to make a shutter using card. I taped one end of the card onto the tube and put a little piece of tape round the edges and end as tabs, so that when the shutter is closed no light will get into the tube and ruin the process. After making the pinhole camera, I went into the dark room to prepare the photographic paper; I cut the paper to the size I wanted then slid it into the tube, making sure that the shiny side of the paper was facing my pinhole. Once the paper was in, I placed the lid on my tube and put tape all over the top and around the side to make sure no light would get in, then I headed out to take my pictures. Once I had found the place I wanted to take my pictures, I placed the camera down on a surface that would be stable and not make the image shaky. As I was outside and my focal length wasn’t very large, I only had to leave the shutter open for 15 seconds. So I opened my shutter for 15 seconds before shutting it again, making sure it was securely shut. I then headed back inside to the dark room.
Once in the dark room I took all the tape off my lid and took out the paper. I placed my paper the shiny side down into the first tray which was the developer, I left it in the tray for 30 seconds before taking the paper out using tongs and placing it into the second tray which is called the stop, I only left the image in there for 10 seconds before moving it over into the third tray, the fixer. I left the image in that tray for the same time as the first before taking the image out and leaving the dark room so I could get a better look at the image. Once I was happy with the image I had to take it back into the dark room and put it back in the fixer for a further 5 minutes, just to make sure it stopped developing. While the image was in that tray, I set my camera up so I could go out and take another picture.After 5 minutes, I took the picture out of the fixer tray and placed it in the wash, which is just a tray of water which washes all the chemicals off. Once the image had been washed I headed out the dark room with my camera all set up and my image. To dry the image off, I placed the image into a machine which takes the image through and dries it off. I done this process 3 times, as after every picture you take you have to go back and re-set everything up.
After making a Gmail account and my own blog, I then had to scan my images onto my account and send them to my emails. I firstly had to scan my student card over the scanner so that it would log into my account, I then placed my images on the bed and started my scan, before I sent the images to myself I changed the format to JPEG. I then scanned my card again logging me out and headed over to my pc. Once on my PC I opened my emails to get the pictures before saving them into my documents, making sure they are still a jpeg file. I then opened up adobe Photoshop, I went up to the file drop down list at the top and clicked ‘open’, once the box popped up I then found my image and selected it. As I scanned all my images together they were all in one file, so I had to crop and paste the image. I used the select tool and dragged the area I wanted to cut out, once I selected the area I went up to the edit drop down list and selected ‘Copy’. As I wanted to save this as a new file I had to open a new page, once the new page was open I pasted the image I had copied onto it, before editing I saved the image so that I would have an original copy. Once the copy had saved I clicked new adjustment layer before then clicking the invert button on the right side, switching the image from positive into negative. I then saved the image so I had two copies, One positive and another negative. I did the same process another 2 times so I would have two copies, one negative and one positive, of all my images. I had to make sure all the images were saved as a JPEG file.
Analyse
I had a few problems with my images. I took the camera out 5 times but only 3 of my images actually processed and worked properly. On each picture I took I had to adjust the time the shutter was open. The first time I left the shutter open for 30 seconds but unfortunately the exposure was too high so my images just turned out black.
 |
| My first attempt |
This happened another 2 times, but with my third image I changed the shutter open time to only 15 seconds, this time the image appeared but only faintly.
 |
| My second attempt. |
On my 4th attempt I decided to change where I shot the image and took an image from inside. As I was inside and the exposure was lower I had to leave the image for longer, so I left it for roughly 2 minutes. This time the camera captured the image well and once I developed the image I was happy with what came out, the camera moved slightly during the time the shutter was open so there was a slight blur in the image.
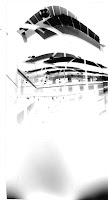 |
| My fourth attempt. |
As the image was blurred slightly, I decided to go and take the same image again. So I headed up to the second floor and left my camera with the shutter open for another 2 minutes. This time the image worked better as there was no blur.
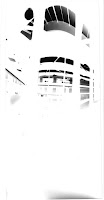 |
| My fifth attempt. |
I preferred one of my images better once it had been inverted on Photoshop, as the negative gave the image a haunted and scary look, which I like. You can also see the image more clearer than if it was positive. I inverted all my pictures I took, I really like the outcome as there alot darker and you can see more detail.
 |
| Edited copy of my first attempt. |
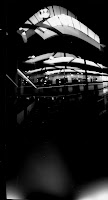 |
| 4th attempt inverted. |
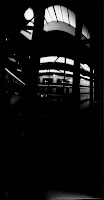 |
| 5th attempt inverted. |
Research and Development.
In time technology has developed drastically, For example the pinhole process takes quite a long time, as you have to develop each image and also you need a dark room to use this process, but now days lots more people are using digital camera, as there quick and easy. Digital cameras don’t use photographic paper, also the camera has sensors so the shutter opens and closes itself and also controls the amount of light taken in. The digital camera has a memory and can hold more than one image at a time.
As more people are using digital cameras, which capture in colour, there have been more editing software’s created, which enabled people to edit there coloured images further, for example, add effects to the image. Through time the mega pixels and size of the lens have changed, for example, digital cameras generally only have a small lens, whereas, expensive professional cameras have a large lens.
In time there have been many techniques of photography, for example in the ancient times they just used a static pinhole, but in the 17th century artists made the pinhole portable in the form of sedan chairs. In 1861 a Scottish physicist James Clerkwell demonstrated a colour photography system, involving 3 black and white photo’s through a red, green or blue filter, which then lead onto Kodak bringing out the first camera containing a roll of film in 1889.
No comments:
Post a Comment